Tuna Melt Recipe

- Published
- 13 comments

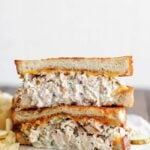
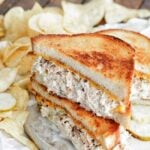
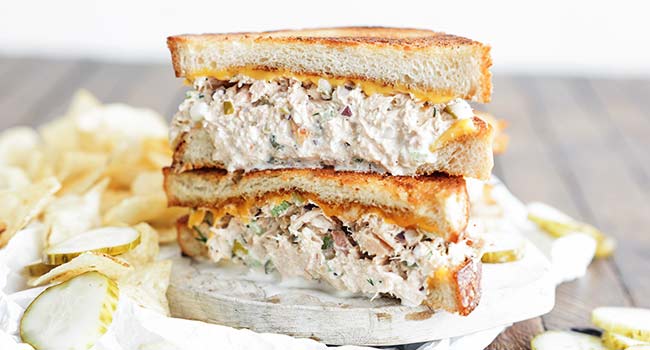
This Tuna Melt Sandwich layers a creamy, tangy tuna filling and melted American cheese between buttery toasted bread slices. I love making this grown-up version of the childhood classic for a quick weekday lunch or dinner.
As a self-proclaimed sandwich fiend, I’m always up for a trip to my local deli to pick up some bacon to make my Ultimate Homemade BLT Sandwich, ground beef for my marinara-drenched Meatball Subs, and canned tuna for this ultra-creamy tuna melt recipe. Tuna melts are one of my favorite sandwiches for myself or my family because they’re so simple yet cheesy and comforting.
What is a Tuna Melt?
A tuna melt is the ultimate mashup of two comfort food favorites: a gooey, buttery grilled cheese sandwich and creamy tuna salad. This comforting sandwich’s origins date back to the 1960s in diners and lunch counters across America, offering an easy yet indulgent meal that’s stood the test of time.
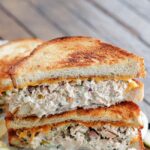
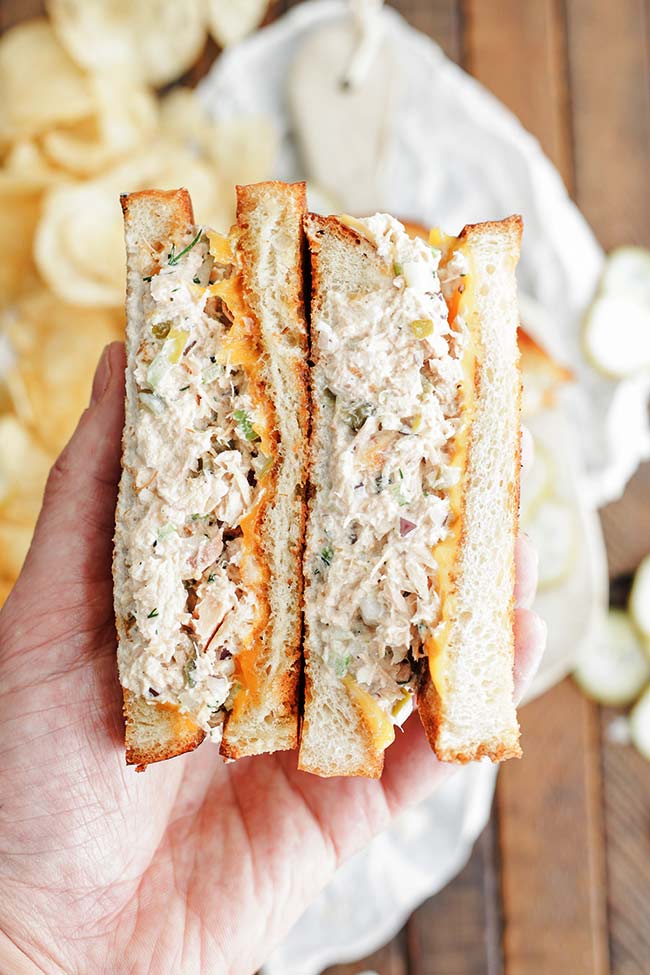
While there’s nothing wrong with a classic deli tuna melt sandwich, I’m an even bigger fan of my homemade version. The flavors in the tuna filling are elevated, thanks to a mix of sharp and crisp vegetables, chopped pickles and capers, and plenty of fresh dill and lemon juice. Each component complements the firm tuna, gooey melted American cheese in the middle, and the toasted bread that holds it together.
Ingredients and Substitutions
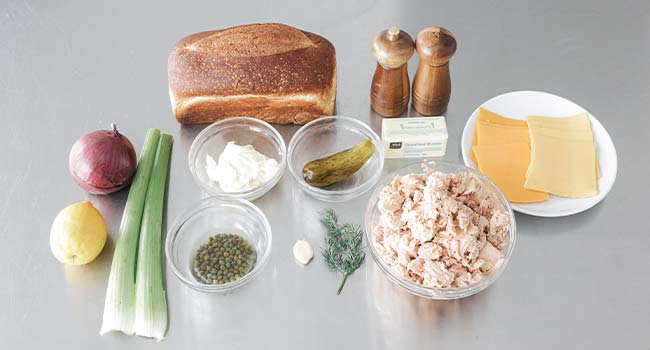
- Tuna — I use canned solid white albacore tuna in water for this simple sandwich. I like its mild flavor and find that its firm and meaty texture holds up well between the toasted bread. Chunk light tuna is also a great option but is slightly softer.
- Mayonnaise – I use real, full-fat mayo to bind the tuna mixture.
- Vegetables – Diced celery, red onion, and minced garlic add a lot of crunch and fresh, sharp flavors to the tuna filling.
- Pickles – A must for that irresistibly tangy crunch. If you prefer a sweeter flavor, use a scoop of sweet pickle relish or swap the dill pickles for bread-and-butter pickles.
- Capers – I use pickles and capers because I love a lot of salt and brine in the filling. Chopped green olives will work well as a substitute or you can omit the capers entirely to replicate the classic sandwich.
- Lemon – I use freshly squeezed lemon juice to brighten and balance the richness of the tuna and mayo.
- Dill – Fresh dill adds bright and herby notes. If you’re out of fresh dill, use one teaspoon of dried dill instead.
- Butter — I toasted the bread in melted unsalted butter to make it extra golden, rich, and crispy. Olive oil, avocado oil, and clarified butter will also work.
- Bread – I like these sandwiches best with thick slices of classic white bread, but you can also use sliced sourdough, rye, whole wheat, or artisan bread.
- Cheese – There’s no better choice than American cheese on a classic tuna and cheese melt! You can always use cheddar instead if you like a sharper flavor, or go with Swiss or pepper jack cheese if you want a creamier bite.
How to Make the Best Tuna Melt Sandwich
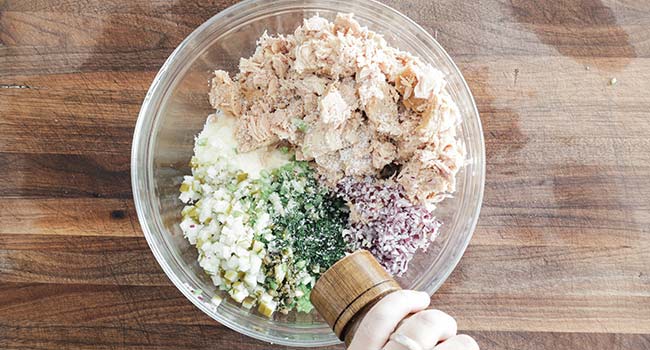
Prepare: I mix the tuna, mayo, celery, onion, garlic, pickles, capers, dill, lemon juice, salt, and pepper in a large bowl until well combined.
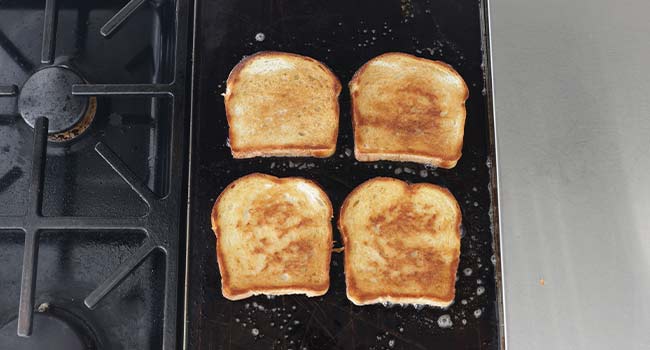
Preheat: Melt a tablespoon of butter in a griddle or large cast-iron skillet over low-medium heat. Once the butter starts to bubble, I add four slices of bread and toast them for about two minutes.
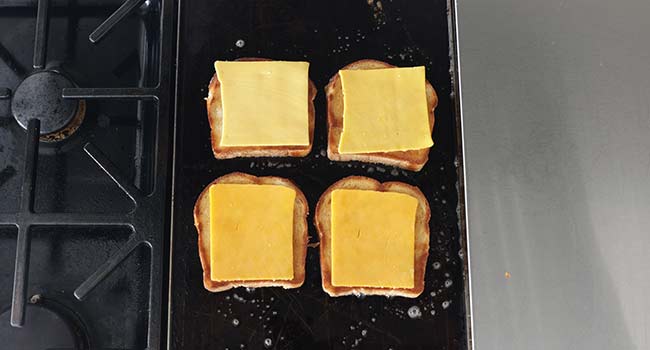
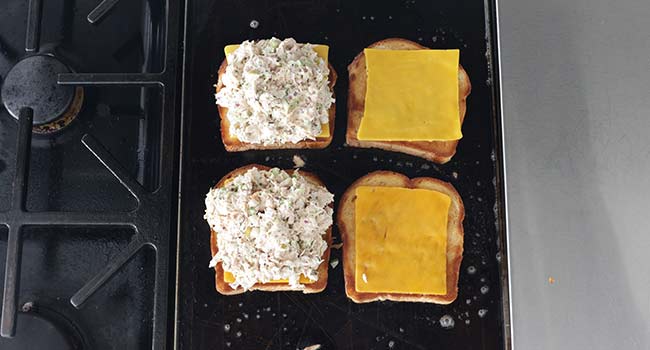
Build the melt: I flip the bread and drop more butter into the skillet/griddle. I layer a slice of cheese on each toasted piece of bread and spread a generous scoop of the tuna mixture on two slices.
Assemble: Once the cheese has melted, I take the two slices of bread with just the cheese and place them on top of the tuna-covered slices, cheese-side down. Then, I remove the sandwiches from the skillet/griddle.
Slice and repeat: I let the sandwiches rest briefly before slicing them in half. I repeat the process with the remaining butter, bread, cheese, and tuna filling.

Chef Tips + Notes
The most important advice I can give you is to make the tuna filling creamy but not so moist that it makes the bread soggy. To avoid this, drain the canned tuna really well, don’t add more than the recommended amount of mayo, and toast the bread until both sides are golden and crusty.
- Toast on low to medium heat: You don’t want to set the heat any higher than medium or else the bread will burn. If the bread takes a little longer than you’d like to turn golden brown, cover the skillet with a lid to help lock in the heat.
- Try an open-faced tuna melt: Instead of the classic sandwich, pile the tuna filling on one slice of toasted bread, top with a slice of cheese, and transfer the sandwiches to a baking sheet. Broil the open-faced sandwiches for 2 to 3 minutes or until the cheese is bubbly.
- Customize the flavors in the filling: Tuna melt recipes are notoriously flexible, and my recipe is no different. There are lots of mix-ins you can add to the filling to play with the flavors, like smoky spices (paprika, cayenne, etc.), minced green onions, pickled jalapeños, a spoonful of horseradish, diced roasted red peppers, a dash of hot sauce, a squeeze of Dijon mustard, or chopped sun-dried tomatoes.
- Tuna melt topping ideas: The sandwich is filling and delicious as-is, but if you’re craving a bulkier meal, add sliced tomatoes, pickles, or bacon on top before finishing them with the second slice of bread.
Serving Suggestions
I typically serve tuna melts with crispy French fries or potato chips during lunch. If you’re craving an old-school deli-style lunch, I recommend serving the sandwich with a dill pickle spear and creamy coleslaw or potato salad on the side.
When I’m making a comforting meal for my family, there’s no better side dish than freshly made tomato soup. After all, nothing beats dipping a cheesy, melty sandwich into a warm bowl of soup.
Make-Ahead and Storage
Make-Ahead: You can fill the tuna salad up to 1 day in advance and store it in an airtight container in the fridge. When you’re ready to eat, assemble the sandwiches and toast them fresh.
How to Store: Leftover sandwiches or tuna melt filling can be stored in an airtight container in the fridge for up to 2 days.
How to Reheat: Reheat the leftover or pre-made sandwiches in a skillet over low heat until warm and the bread is crispy. You can also warm them in a 375ºF air fryer or toaster oven.
More Classic Sandwich Recipes
- Classic Reuben Sandwich
- Roast Beef Sandwich
- Fried Green Tomato Sandwich
- Monte Cristo Sandwich
- Crab Cake Sandwich

Tuna Melt Recipe
Ingredients
- 4 5- ounce cans drained tuna
- 2/3 cup mayonnaise
- 2 small diced ribs of celery
- 1 finely minced garlic clove
- 1 tablespoon finely minced capers
- 1 small diced dill pickle, about ¼ to 1/3 cup
- ½ peeled small-diced medium sized red onion, about ½ cup
- 1 tablespoon finely minced fresh dill
- Juice of ½ lemon, about 1 ½ tablespoons
- 4 tablespoons unsalted butter
- 8 sliced white bread
- 8 slices American or cheddar cheese
- coarse salt and freshly cracked pepper to taste
Instructions
- Mix the tuna, mayonnaise, celery, garlic, capers, pickle, onion, dill, lemon juice, salt, and pepper in a large bowl.
- Add 1 tablespoon of butter to a griddle or large cast-iron skillet over low-medium heat. Once melted and bubbling, add 4 slices of bread and toast for 2 minutes.
- Flip the bread over and add 1 more tablespoon of butter. Then add 1 slice of cheese to each toasted piece of bread, some of the tuna to two slices of bread, and cook for 2 minutes.
- Place the empty toasted piece of bread with cheese on top of the tuna, remove it from the griddle, slice it, and serve.
- Repeat the process with the remaining tuna, butter, cheese, and 4 slices of bread.
Best tuna sandwich I’ve ever had! Chef Billy’s focus on technique yields great results : )
Amazing! Thank you!!
This with fresh tuna…epic! Also, on my grilled sandwiches, and even just cheese, I add some grated Parmesan or Romano cheese, or both, to softened butter to spread on the bread before grilling. I’m stuck making grilled sandwiches like this forever. A plain grilled sandwich is just not the same.
Can’t go back to the old way! Thanks for giving it a try!
This was delicious! I didn’t have any capers so I just added more pickles. So good!
great!
It has a lot of flavor using the instructioned ingredients, however, it was so runny with just one can of tuna, I added another and was still rather wet, tuna well drained.
Drain your tuna well everyone 😉
Also, they were using 1 can of tuna to start. They have to adjust the other ingredients accordingly.
I loved this! My previous attempts were open faced, but this sandwich was over the top. Thanks Chef Billy!
Perfect!!
This is the PERFECT Tuna Melt! Thanks Chef. Loved it.
Thank you for giving it a shot!