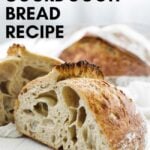
Sourdough Bread Recipe
Published April 29, 2020. This post may contain affiliate links. Please read my disclosure policy.


Learn how to make an absolutely delicious sourdough bread recipe every single time using my foolproof easy to follow steps.
I’m a huge homemade bread fan and perfecting the art of making it is incredibly fun. If it doesn’t matter if I’m making Naan or a Kamut Flour Loaf, it’s always so rewarding.

Sourdough
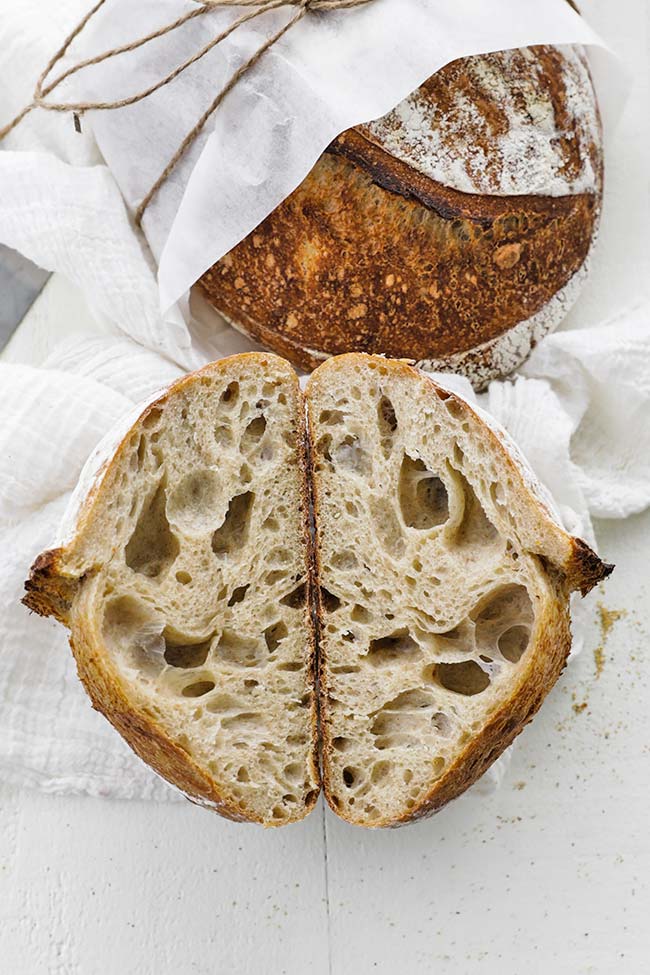
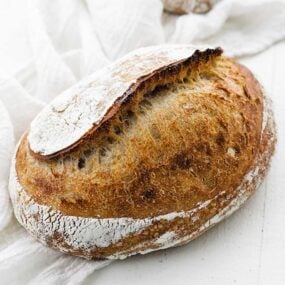
Just like I say for homemade pasta, there is nothing like homemade bread, nothing. Sourdough is essentially the original leavened bread recipe using a natural yeast starter. It has a unique slightly sour taste and when made correctly is packed with beautiful air pockets and an amazing outer crust.
While you may immediately think of San Francisco when it comes to sourdough bread, Egypt is the early creators of this. Wild yeast would get into the dough mixes and when it baked, it rose to make it a leavened loaf.
What Make’s It Sour
The sour flavor in the bread comes from the fermentation process that takes place when preparing your starter. When you incorporate that sour starter into the bread it also bulk ferments for several hours making it a tad sourer.
If you love that flavor and want it to be more intense than do not go through the starter discard process, simply add it in the morning straight to your bread after it autolysis.
Health Benefits of Sourdough Bread
There are incredible health benefits to making and eating it. First and foremost, you use a few ingredients that are all-natural, which is always better than the bread from the store that has 27 things in it you can’t pronounce.
Sourdough is jam-packed with daily vitamins and minerals such as iron and Vitamin B. To me the most important part is the natural probiotics that are in the bread to aid in digestion.
During the bulk fermentation process, the good bacteria that have been created in your starter will break down the gluten in your autolyzed dough making it easier to digest. The result is a delicious bread that isn’t going to leave you bloated, and my personal belief is the gluten intolerant could most likely be able to eat and digest this.
What’s In It
There are only 3 ingredients in this recipe consisting of flour, water, and salt, that’s it. With that being said, you will need to have an active starter before making this sourdough recipe.
What Do You Cook It In
The best thing to cook it in is a cast iron pan that has a very tight lid. The tight lid is key to help to keep moisture in the pan when it is cooking which will assist in the crust, tenderness, and moistness in the loaf.
I am a huge fan of the Challenger bread pan as it is designed specifically for baking amazing bread. Here are a few other things you can use:
- Dutch oven pot with a lid
- Lodge combo pan
- High-temperature pot with a lid
- Pizza stone with a pan of water on a separate rack
- Cookie sheet pan
Tools Needed to Make It
Here is what you will need to make this sourdough:
- Gram Scale
- Large Bowl
- Banneton
- Kitchen Towel
- Plastic Containers
- Pot and Lid
How to Make It
Follow these foolproof steps to make delicious sourdough bread:
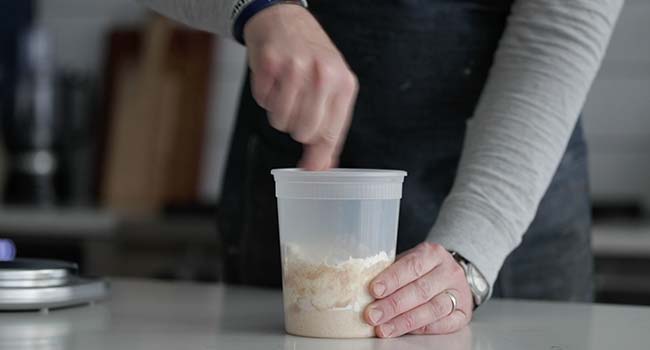
- Feed your starter and activate it by placing it in the oven, with only the oven light on and leaving the oven door cracked for about 4 hours or until it has at least doubled in size and is beginning to fall. (See chef notes below)
- Once the starter begins to fall begin the autolyse process by mixing together your flour and filtered water. Cover with a damp towel and place it in the oven next to your starter and autolyse for 30 minutes.
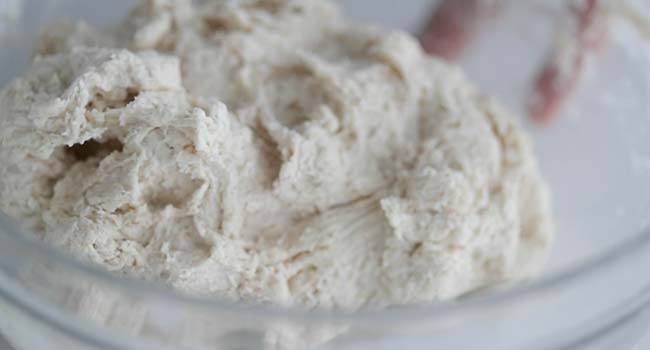
- Add your starter to the dough and mix in, which takes about 90 seconds. Cover with a damp towel and place it in the oven and autolyse for 30 minutes.
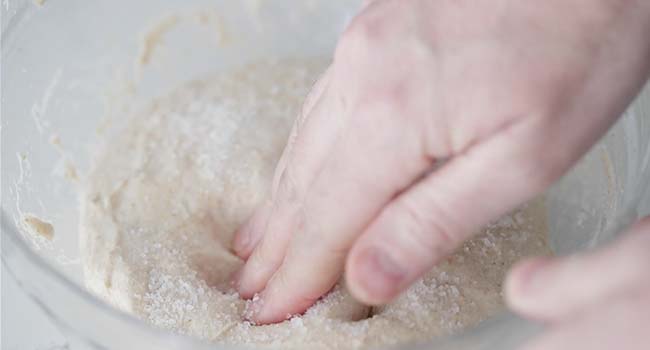
- Measure out and add the salt to the dough, wet your hands with bottled water, and mix it in until combined, which takes about 90 seconds. Cover with a damp towel and place it in the oven for 60 minutes.
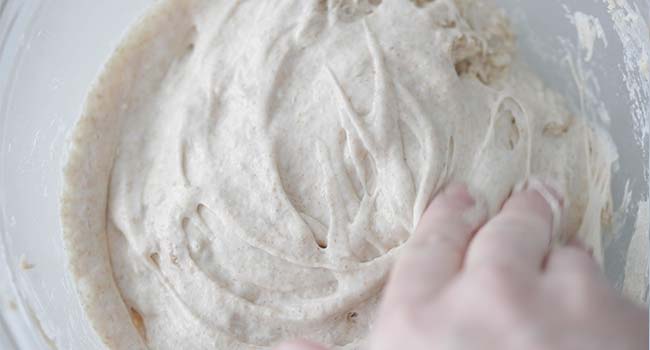
- Perform a series of folds to the dough for about 90 to 120 seconds to strengthen the gluten in the dough so that it will eventually hold shape. Cover with a damp towel and add it to the oven with the light on for 60 minutes and repeat this process 3 more times.
- After the last fold to the dough Cover with a damp towel and place it in the oven for only 30 minutes this time.
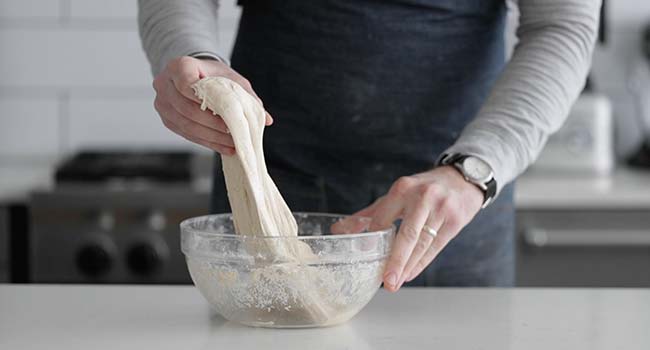
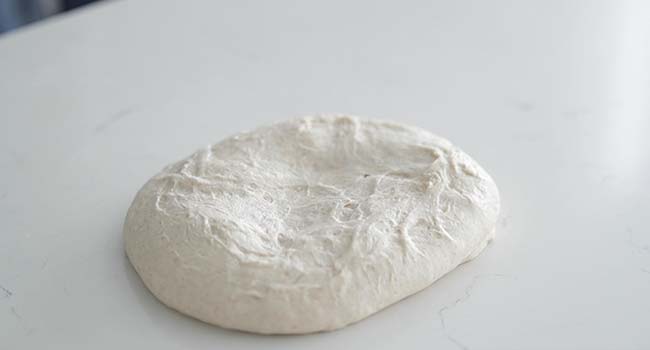
- Remove the dough and place it directly on your countertop. Rub a little flour to the top using your hand and curl in the bottom of it using a bench knife to make it taught and tight on top.
- Flip the dough over and stretch out as much as you can to a rectangle shape.
- Fold the right side to the left side over to cover about 2/3 of the dough.
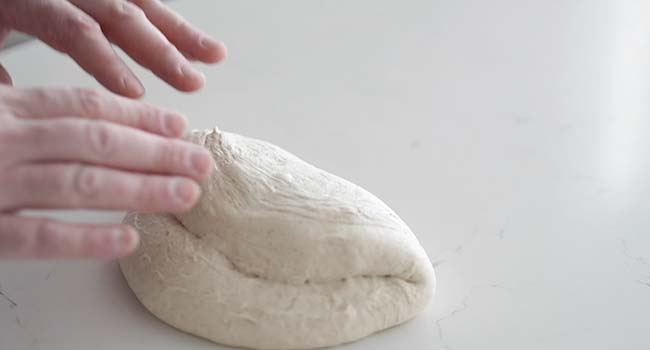
- Now fold the left side as much as you can over the right side.
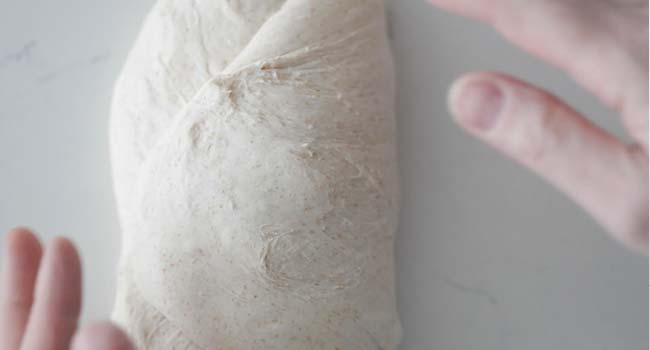
- Starting from the bottom roll up the dough to the front pulling gently making it as taught and as tight as possible.
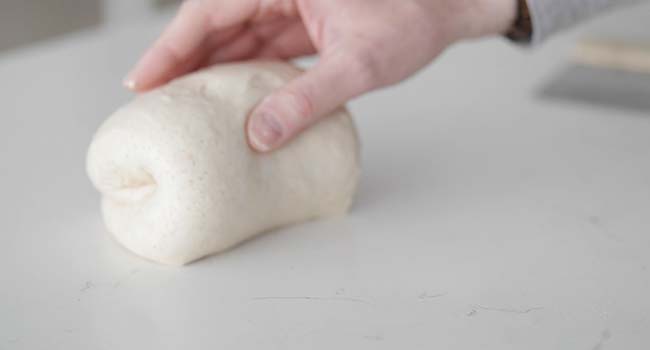
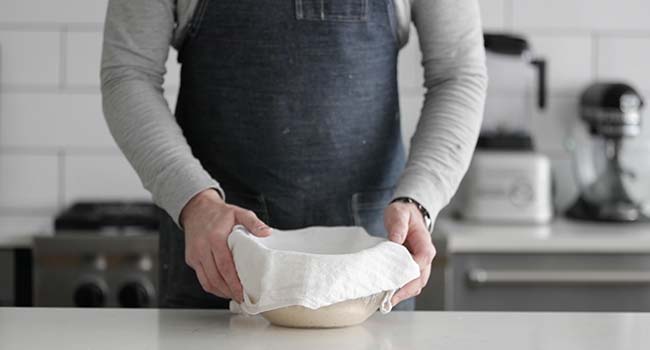
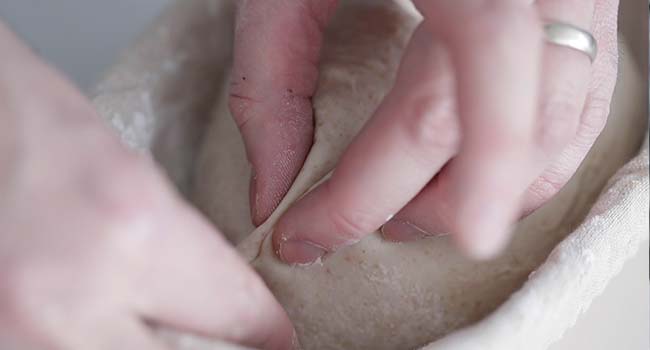
- Transfer the dough seam side up into a lightly floured banneton.
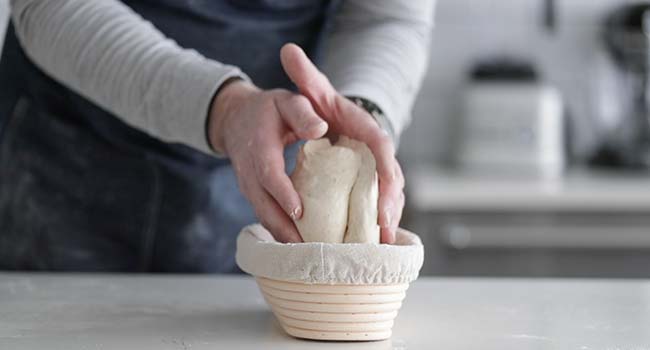
- Pinch together the seams to help create more air pockets in the bread and to aid in the rising process.
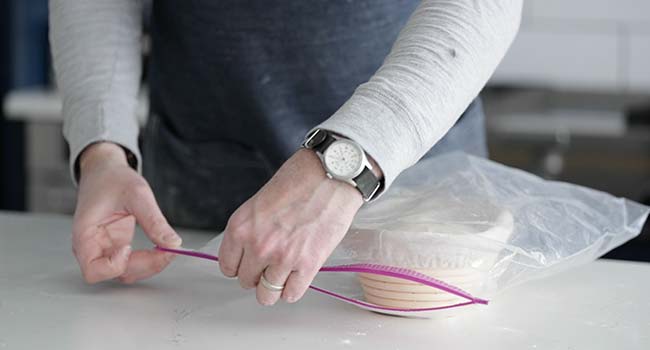
- Cover in plastic, a towel or in a large plastic zip bag and refrigerate for 12-16 hours or up to 24 hours.
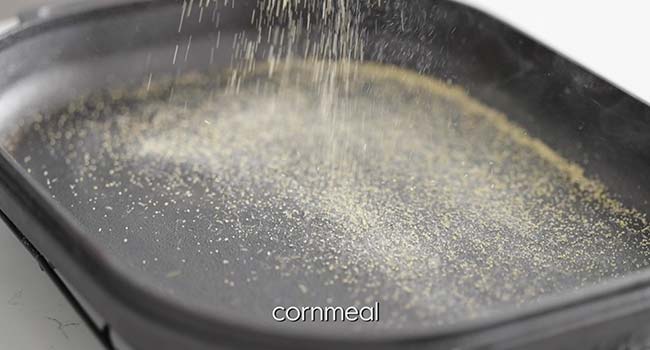
- The next morning preheat your pan in the oven at 500° for 30 minutes and then remove the lid and sprinkle cornmeal onto the bottom of the hot pan and then also on top of the dough.
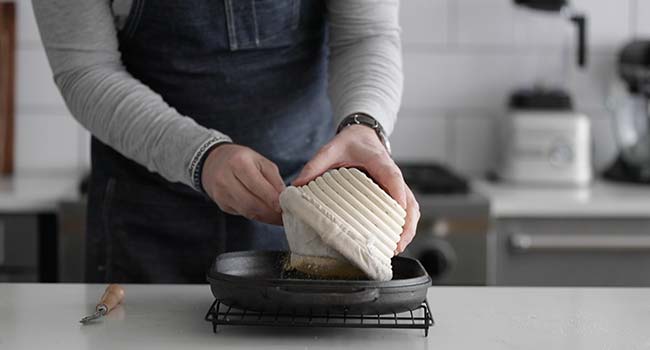
- Immediately flip the dough in the banneton over to the center of the hot pan.
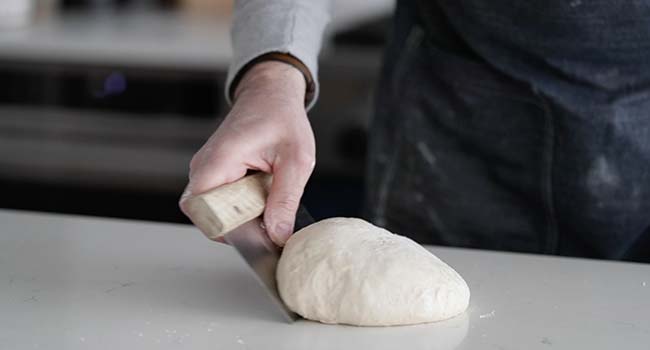
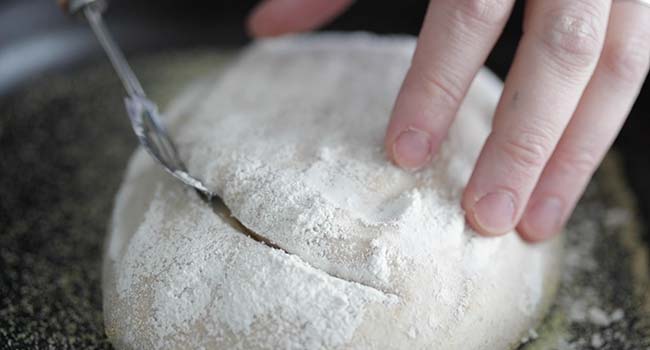
- Score the bread using a razor, sharp knife, or bread knife.
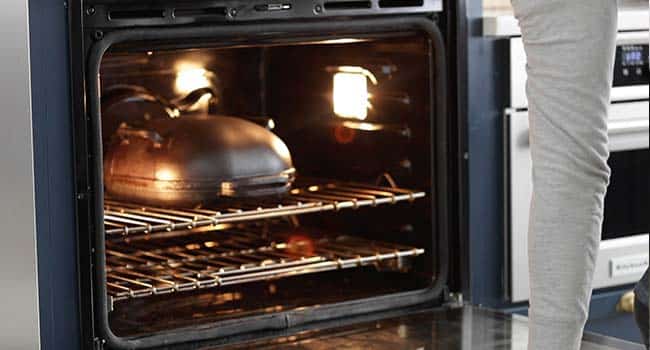
- Place the lid onto the pan and bake for 20 minutes.
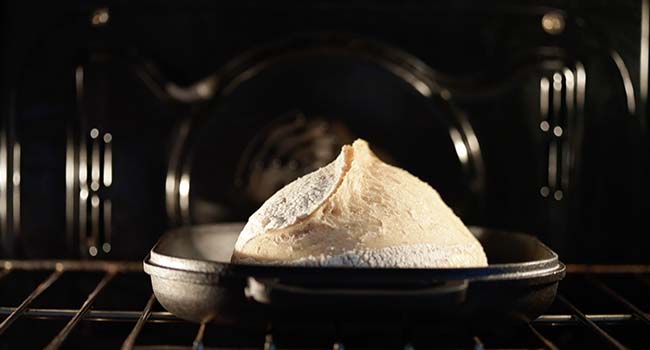
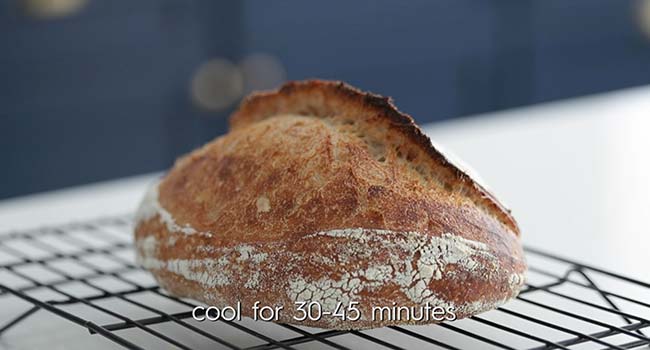
- Remove the lid and bake for 15 more minutes to help with brown the bread.
- Cool on a rack to room
Make-Ahead and Storage
Make-Ahead: You can make this bread up to 1 day ahead of time.
How to Store: Store this bread wrapped in parchment paper and keep at room temperature for up to 4 days. You can cover and keep in the refrigerator for up to 7 days.

chef notes + tips
- The water temperature should be between 30-33° C or 87-93° F and can be warmed up in a pot or in the microwave.
- To make a proofing environment if you don’t have a bread proofer, simply turn the light on in your oven and leave the door cracked. It will be between 78° and 84° in there which is perfect.
- What Is Autolyse: This is the process of mixing your flour with your warm water until combined and let the natural starches and sugars start to work before adding in your levain or yeast. This helps the rising, forming, and overall bread-making process.
- You will know when it’s time to begin the autolyse process when your starter begins to fall from its peak volume.
- It’s important to use filtered water in making bread as too much chlorine in tap water will kill the starter.
- The reason for using all-purpose flour in the recipe is because it is more commonly used and acquired in households, plus during the stay at home orders, it’s hard to get bread flour.
- If you want to use bread flour instead of all-purpose flour, increase the amount of water by 5-10%.
- When performing the folds be sure not to pull so hard you tear the dough. Watch the video below to see how to properly do it.
Here are some affiliate links to the products I used in this video:
- Plastic containers for starter
- Bowls
- Scale
- Banneton
- Kitchen towel
- Challenger bread pan
- Bench knife
- Hefty bags
- Bread scorer
- Resting rack
More Amazing Bread Recipes
Be sure to follow me on Facebook, Youtube, Instagram, and Pinterest, and if you’ve had a chance to make this then definitely drop me a comment and a rating below!

Video
Sourdough Bread Recipe
Ingredients
For the Starter:
- 75 grams of active starter
- 55 grams all-purpose flour
- 20 grams whole wheat flour
- 75 grams warm water
For the Bread:
- 350 grams all-purpose flour
- 50 grams whole wheat flour
- 75 grams fed starter
- 14 grams sea salt
- 275 grams warm water + extra for dipping
Instructions
- Feed your starter and place in a warm place for 4 hours or until it has at least doubled in size and is beginning to fall. (See chef notes below)
- Once the starter begins to fall being the autolyse process by mixing together your flour and filtered water. Cover with a damp towel and place it in the oven next to your starter and autolyse for 30 minutes.
- Add your starter to the dough and mix in, which takes about 90 seconds. Cover with a damp towel and place it in the oven for 30 minutes.
- Measure out and add the salt to the dough, wet your hands with bottled water, and mix it in until combined, which takes about 90 seconds. Cover with a damp towel, and place it in the oven for 60 minutes.
- Perform a series of folds to the dough for about 90 to 120 seconds to strengthen the gluten in the dough so that it will eventually hold shape. Cover with a damp towel and place it in the oven for 60 minutes and repeat this process 3 more times.
- After the last fold to the dough, cover with a damp towel and place it in the oven for only 30 minutes this time.
- Remove the dough and place it directly on your countertop. Rub a little flour to the top using your hand and curl in the bottom of it using a bench knife to make it taught and tight on top.
- Flip the dough over and stretch out as much as you can to a rectangle shape. Fold the right side to the left side over to cover about 2/3 of the dough. Now fold the left side as much as you can over the right side. Starting from the bottom roll up the dough to the front pulling gently making it as taught and as tight as possible.
- Transfer the dough seam side up into a lightly floured banneton and pinch together the seams to help create more air pockets in the bread and to aid in the rising process.
- Cover in plastic, a towel or in a large plastic zip bag and refrigerate for 12-16 hours or up to 24 hours.
- The next morning, preheat your pan in the oven at 500° for 30 minutes.
- Next, quickly sprinkle cornmeal into the bottom of the pan. In addition, sprinkle cornmeal to the top of the dough just to make sure it doesn’t stick.
- Immediately flip the dough in the banneton over to the center of the hot pan and score the bread using a razor, sharp knife or bread knife.
- Place the lid onto the pan and bake for 20 minutes.
- Remove the lid and bake for 15 more minutes to help with brown the bread and cool on a rack to room temperature.
Notes
- The water temperature should be between 30-33° C or 87-93° F and can be warmed up in a pot or in the microwave.
- Make-Ahead: You can make this bread up to 1 day ahead of time.
- How to Store: Store this bread wrapped in parchment paper and keep at room temperature for up to 4 days. You can cover and keep in the refrigerator for up to 7 days.
- To make a proofing environment if you don’t have a bread proofer, simply turn the light on in your oven and leave the door cracked. It will be between 78° and 84° in there which is perfect.
- What Is Autolyse: This is the process of mixing your flour with your warm water until combined and let the natural starches and sugars start to work before adding in your levain or yeast. This helps the rising, forming, and overall bread-making process.
- You will know when it’s time to begin the autolyse process when your starter begins to fall from its peak volume.
- It’s important to use filtered water in making bread as too much chlorine in tap water will kill the starter.
- The reason for using all-purpose flour in the recipe is because it is more commonly used and acquired in households, plus during the stay at home orders, it’s hard to get bread flour.
- If you want to use bread flour instead of all-purpose flour, increase the amount of water by 5-10%.
- When performing the folds be sure not to pull so hard you tear the dough. Watch the video below to see how to properly do it.
I followed this recipe multiple times and It’s always good. It’s complicated as any sourdough recipe. But, I will not switch to any others. Thank you Billy
many thanks!
I’ve made this several times now and it always comes out excellent.
Excellent!
This is my go to recipe for sourdough bread, it always turns out fantastic
appreciate you trying it
This is my go-to recipe for sourdough bread, it never fails and tastes delicious
so good!!
I made this sourdough for St Patrick’s Day and it was the best sourdough bread I’ve ever made. I’ve made it two more times and the recipe has proved to be outstanding. Thank you Chef Parisi.
Wow, nice job!
I can’t wait to try this recipe! I know I already gave it 5*, because the tutorial and information is amazing! I also just purchased the book you mentioned; Flour, Water, Salt, Yeast! Thank you for sharing your knowledge!!!
thanks for giving it a shot!!
I love the recipe, and I followed it exactly, but on the last time it was in the oven with the light on and the door open part way for 30 minutes, it came out too loose and wouldn’t hold come taughtly together. When I did the final folds, it just spreads. I put it in the basket anyway and put it in a plastic bag into the refrigerator. I’m new to sourdough bread baking so I’m still trying to figure it out. Can you tell me what I may be doing incorrectly? Thanks. Laura
It just got a little too hot. Maybe crack the door a bit more next time.
Hi Chef! I’m looking to get an extra tang, I’m new to baking with sourdough and am in a search for my go-to recipe for bread. After all the bloggers and YouTubers. I feel super comfortable to try your recipe! I do have a question. When you say this: “If you love that flavor and want it to be more intense than do not go through the starter discard process, simply add it in the morning straight to your bread after it autolysis.” – does that mean skip the refresh/4 hours rise and fall? Or just feed it without refreshing? Or literally put the starter straight in?
Skip the refresh
I’ve tried many sourdough recipes that cheat with yeast (or it becomes a brick) …this recipe really works! Delicious & soury with consistent results. Thanks!
Made this recipe today chef. Wow. I’ve been cooking professionally for 18 years and this is the best sourdough recipe have ever made. I have a San Francisco started I have been culturing for 2 years and you really made it sing. Cheers chef. Nice work.
Is it possible to double or triple this recipe. Love the recipe but its not enough.
Yes but you need to divide the dough into thirds