French Boule Recipe
Published December 9, 2024. This post may contain affiliate links. Please read my disclosure policy.
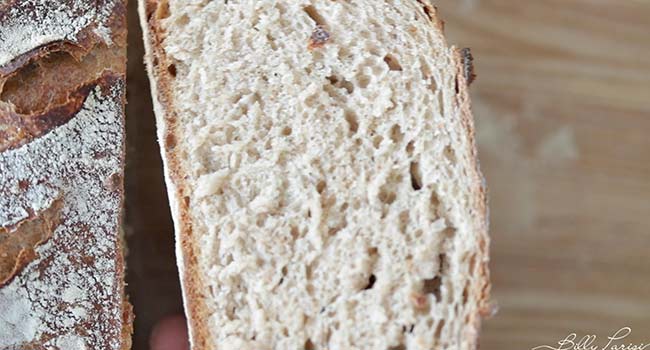
Learn how to make a traditional French Boule with a poolish preferment. This impressive artisanal loaf is perfectly chewy, soft, and fluffy on the inside and has an eye-catching dark brown crust on the outside.
Even if you’re new to bread baking, my French Bread, Homemade Artisan Bread, and this French boule recipe with poolish are the perfect additions to your to-bake list. They’re easy to master and make you feel like a seasoned baker in no time!
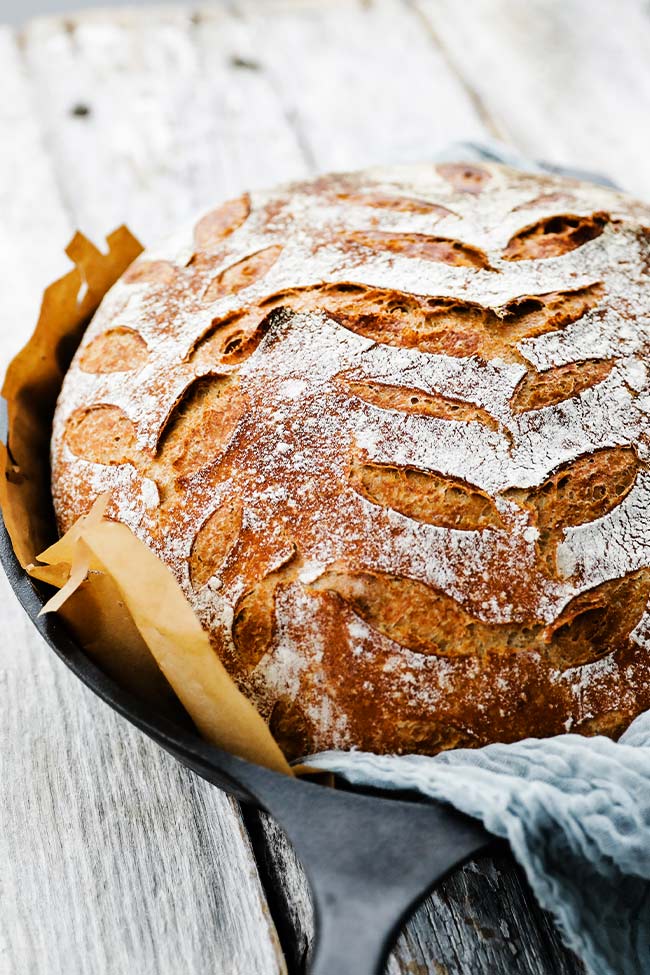
Classic French Boule
There’s nothing inherently wrong with baking bread in a bread machine, but I wouldn’t call that true bread-making. Making delicious artisan bread requires hands-on work, TLC, and love. Classic French bakeries (boulangeries) have mastered this, which is why they’re my #1 source of inspiration when making my homemade bread, including this traditional French boule.
If you aren’t familiar with the French boule, imagine those large, crusty balls of bread with a slightly flattened shape you often see people carrying around in movies set in medieval or ancient times. They’re renowned for their crispy, dark brown crusts and tender, fluffy crumbs.
Baking with a Poolish
While I’ve made kamut flour bread using an Italian biga, this French boule recipe calls for a similar pre-ferment agent called a “poolish.” The difference lies in the hydration levels used during the pre-fermentation process.
The higher hydration of a poolish intensifies the bread’s alcoholic aromas and complex flavors. To make it, mix 50% of your flour with 62% to 65% water and a little yeast, then let it ferment for 10 to 24 hours.
Although a poolish is not a complete fermentation like a sourdough starter (levain), it still breaks down gluten and promotes the formation of beneficial bacteria. As a result, the poolish method isn’t just for a French boule—it’s also great for baguettes and pizza dough.
Ingredients and Substitutions
- Bread flour – This has more protein than all-purpose flour, which gives the boule its chewy texture and structure. I recommend using Bob’s Red Mill Artisan Bread Flour. You can substitute all-purpose flour in a pinch, but your boule may not rise as well or have the same chew.
- Whole wheat flour – I tested this boule recipe with Bob’s Red Mill Whole Wheat Flour, which produced outstanding results.
- Water – A critical component in this high-hydration dough. Be sure to follow the recipe instructions for the water temperature.
- Salt – I like using sea salt in bread recipes, but kosher salt will also work.
- Yeast — You can use active yeast or instant yeast. If using instant yeast, mix it directly with dry ingredients—there is no need to dissolve it in water first.
How to Make French Boule Bread
To make the poolish, mix 50% of the total flour in a large container with 62% of the total 80°F to 82°F water and .5 grams of yeast until combined.
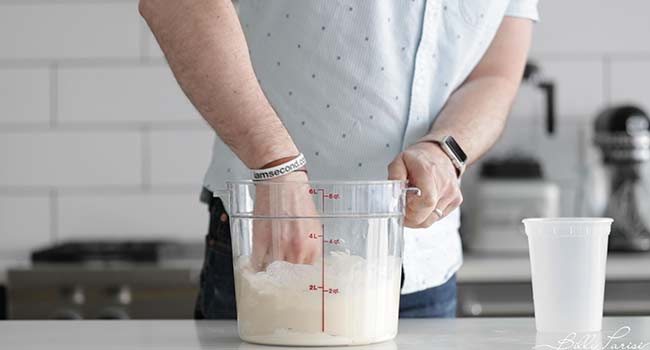
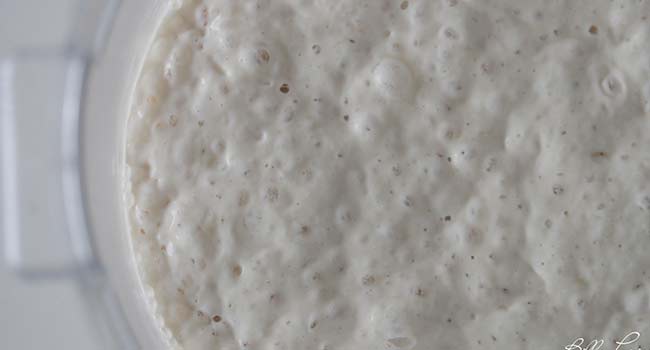
Cover the container and set aside for 10 to 24 hours.
To make the boule, mix the remaining flour, salt, and remaining yeast in a separate large container.
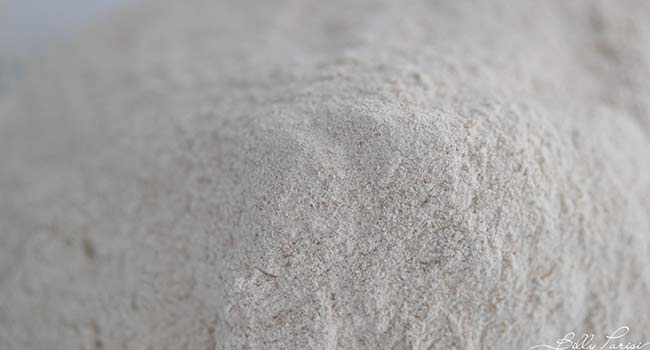
Pour the remaining 105°F to 107°F water into the container with the poolish to help loosen it up.
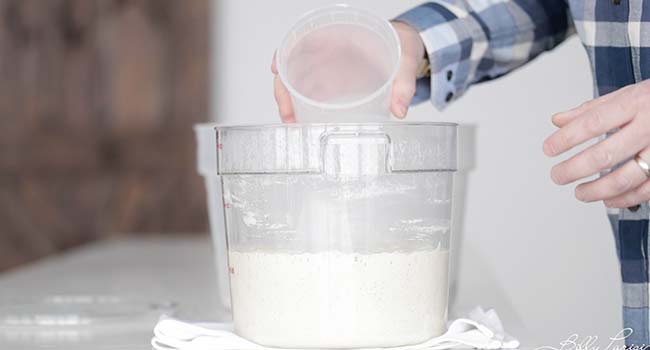
Pour the entire poolish mixture into the container with the dry ingredients. Squeeze and fold the mixture until combined, then cover and let the dough rest for 20 minutes.
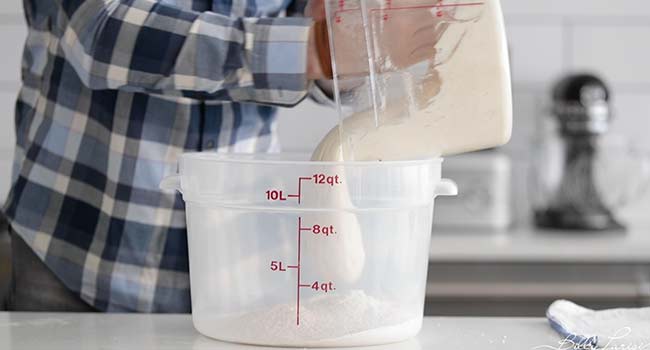
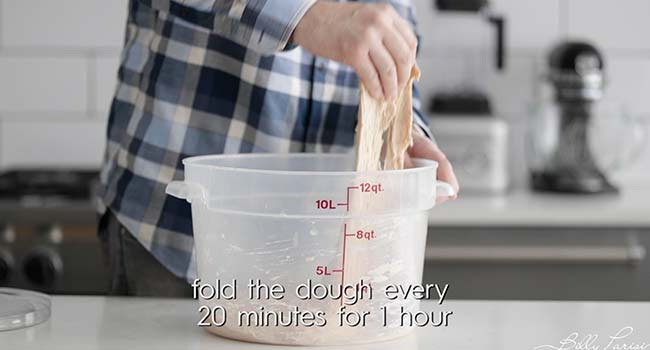
After, fold the dough by stretching and turning it 6 to 8 times every 20 minutes for 60 minutes. Cover and let it rest for 2 hours or until it’s tripled in size.
Transfer the dough to a floured surface and form it into a medium-tight ball.
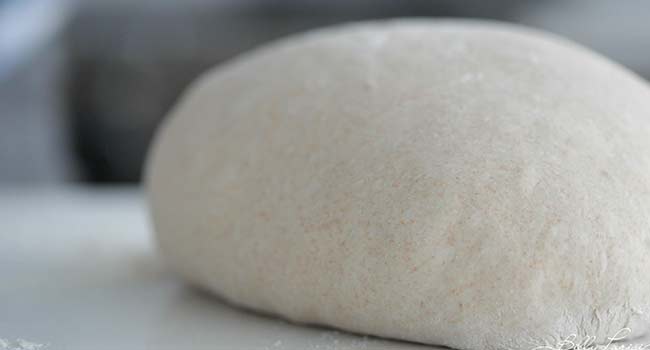
Transfer it to a heavily floured bread-proofing basket or surface, cover it with a towel, and proof it for 60 to 90 minutes.
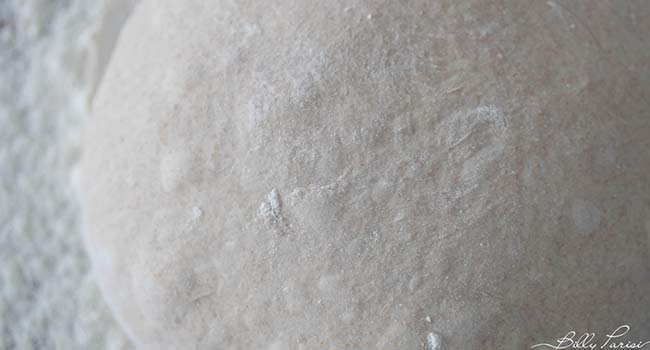
Preheat a baking stone in the oven to 500°F, then let it sit for 30 minutes. A hot baking stone simulates a traditional bread oven, helping the boule develop a crisp, dark brown crust.
Score the top with a blade, then add the bread to the hot stone. Scoring is optional but helps control the bread’s expansion, while baking, and the artisanal presentation make it look more appetizing.
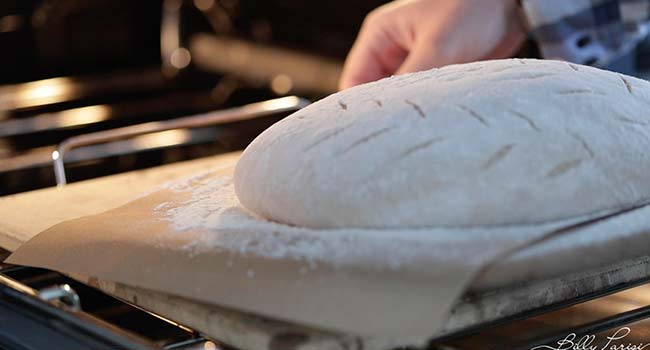
Cover the dough with a large heat-proof metal bowl to trap the steam that will help develop the crust. If you do not have a large metal bowl, adding 10 to 15 ice cubes to a baking dish and placing it on the bottom rack of the oven can also generate steam.
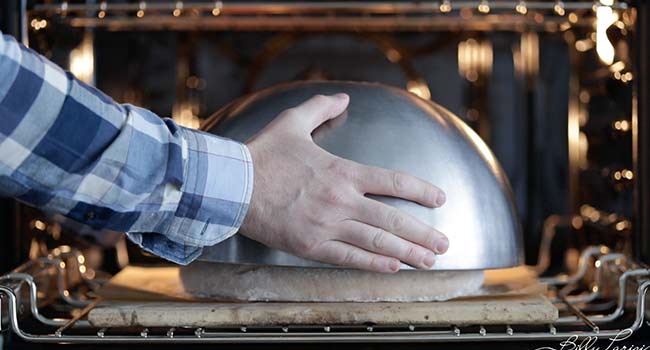
Bake the bread at 500°F for 30 minutes covered, then uncover and bake for an additional 20 to 25 minutes.
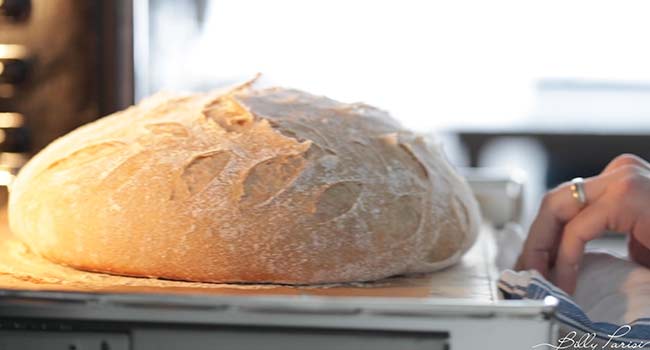
After baking, cool the bread on a wire rack for at least 30 minutes to prevent the bottom from becoming soggy and to allow the crumb to set fully.
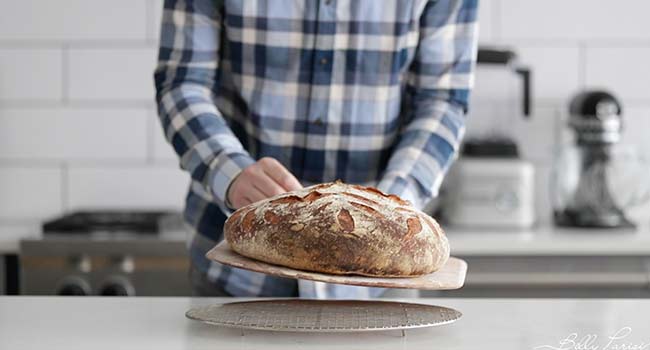
Slice and serve the boule with a smear of butter, or use it to mop up sauces from hearty soups and stews like Boeuf Bourguignon, Split Pea Soup, and Ham and Lentil Soup. You can’t beat a Croque Madame or Croque Monsieur on French boule bread.
Make-Ahead and Storage
Make-Ahead: Letting the boule bread sit for 24 hours before slicing and serving is common in France. This resting period allows the flavors to develop fully and makes slicing easier.
How to Store: Wrap the boule bread in a paper bag or a clean kitchen towel and store it at room temperature for up to 2 days. For more extended storage, consider cutting the loaf into fourths, wrapping them in plastic, and refrigerating for up to 10 days or freezing for up to 3 months. Let the bread sit at room temperature for a few hours to thaw.
Chef Notes + Tips
- Slight variations in water temperature can make or break a boule. For the poolish, the water must be 80°F to 82°F to promote slow fermentation. For the final dough mix, the water must be 105°F to 107°F to activate the yeast.
- Be patient with the poolish. The longer the poolish ferments (ideally 10 to 24 hours), the more intense the aroma and flavor. This pre-fermentation develops the complex flavors that make artisan bread so delicious.
- Handle the dough very gently to develop the gluten without deflating the dough.
- I usually keep the bread dough on a piece of parchment for easy movement.
- Uncovering the bread during the last 20 to 25 minutes of baking is crucial for achieving a delightfully crunchy, dark brown crust.
- If you live in a dry climate, you might need to add extra water to the dough to achieve the proper hydration level. In humid climates, slightly reducing the water can prevent an overly sticky dough.
More Bread Recipes
- Homemade Brioche Bread
- Italian Focaccia Bread
- Homemade Pita Bread
- Homemade White Bread
- Sourdough Bread
Video
French Boule Recipe
Ingredients
- 650 grams Bread Flour
- 500 grams Whole Wheat Flour
- 858 grams of water
- 24 grams of coarse salt
- 4.5 grams of active yeast
Instructions
- In a large container, mix together 550 grams of bread flour with 550 grams of water at 80° to 82° and .5 grams of yeast until combined to make a poolish. Cover and let sit at room temperature for 10 to 24 hours or until tripled in size.
- In a separate large container mix together the remaining 100 grams of bread flour, whole wheat flour, salt, remaining 4 grams of yeast.
- Add the remaining 308 grams of water at 105° to 107° to the container with the poolish to help loosen it up.
- Add the poolish and water mixture to the container with the flour, salt, and yeast and vigorously mix it by squeezing, stretching, and folding until throughly mixed, which takes about 3 to 4 minutes. Cover and let rest for 20 minutes.
- Fold the dough by stretching and turning it 6 to 8 times every 20 minutes for 60 minutes.
- Cover and let rest for 2 more hours or until it has tripled in size.
- Transfer the dough to a clean floured surface dusted with flour and form it into a tight ball. Move the dough to a floured proofing basket or clean surface. Cover it with a towel and let proof for 60 to 90 minutes
- Place a pizza stone into the oven and preheat to 500° and let sit for 30 minutes.
- Score the top with a blade, then the bread onto the hot stone. If you're using a bread basket, then Invert the dough directly onto the stone, score, cover with a large metal bowl and bake for 30 minutes, then uncover and bake for another 20 to 25 minutes or until the outside of the bread is dark brown.
- Set it on a cooling rack for 30 minutes.
- Slice and serve.
I don’t have a baking stone, what can I use as a substitute? I can’t wait to try this recipe.
sheet tray
I made this and they turned out beautifully! I didn’t have bread flour, but I added Bob’s red mill, gluten flour to my all purpose, flour, and the rise was glorious! Thanks Chef!
Mary G.
Excellent!
Oh WOW Chef!!!! You show off!!!, this is Beautiful. I love to see the Bread with all the cuts on top to make this very pretty design. Is there anything at all that you can’t do or make? I love following you and what whats next for all of us. Thank you and God Bless you, for all you do for all of us everyday…
Thank you!!
I love making artisan breads and want to try this. Would it work in a preheated Dutch oven instead of the inverted metal bowl?
yes, as long as it’s big enough or you could divide it into two pots.
Looking absolutely fabulous, definitely will try
Many thanks!
Thank you for helping make cooking and baking easier and better.
my pleasure!
This is my everyday bread. I love sourdough, but travel extensively for work and my husband and kids can be relied on to feed my baby. But with this recipe, you get a very similar flavour with minimal effort. The loaf is HUGE and looks amazing.
You don’t need to be an expert baker to tackle this, just patience. I mix the poolish and then make the bread when I get home from work. The longer you leave the poolish, the easier it is to handle and the flavour is amazing. Basically an idiot-proof recipe. It’s worth getting a scale that measures down to 0.1g if you like making any sort of yeast dough, including sweet ones.
Many thanks!
I looked at this recipe several times before finally giving it a try. I have a few tiny issues with the way the recipe itself is stated but my 7 year old really wanted to help with it so we tackled it 2 days ago.
The results were incredible and the bread is all gone .
The size of the loaf was huge and almost spilled over the edge of my pizza stone but I will be definitely be doing this again but will split it into two loaves.
Hi Chef, my question is the following: I have a 9″ round banneton & a 10″ oval. Can I use the oval understanding that it won’t be round? Thank you in advance.
I live on an island. I bake one or two loaves a week for my GERMAN friends. They love it! One even returned from Germany and said this recipe was better than he could buy there. Having lived there myself, this is so close to bauernbrot. I can’t say enough good things about the flavor and texture.
excellent!
Third attempt at bread. Tried two popular, easier recipes and while they were good, this was the first where the texture wasn’t off. Very good, though I’d prefer less whole wheat.
I was concerned that it wasn’t cooked long enough. Though the top was close to burnt, it still seemed to hold a lot of water. The inside didn’t seem undercooked. How much should this loaf weigh after baking or how much hydration should remain after baking a boule?
Never weighed it in the end.
Did I do something wrong? My dough is like pancake batter. Followed the directions and recipe to a T.
Fantastic recipe I made it first time.. Delicius bread i made 3 loaves. Bravo chef. One question may i use flour like faro insted of whole meal flour. Thanks a lot.
Excellent! Yes you can.
I made this boule 9 days ago, and I still have about 2 days worth of bread left. The size of the loaf is kind of ridiculous, I wish I had split it in 2 and frozen one. I will say that it has just barely staled at all keeping it just wrapped in linen in my unused toaster oven, and the flavor has intensified.
I used mature rye starter in my poolish, and split the second portion of flour with white bread flour, dark rye flour, and wheat.
I will make it again, but probably not the full loaf.
Thanks so much for teaching me to be a better cook💕 I love open airy textured bread. Do you think adding vital wheat gluten to this recipe would give me a more airy texture? How much should I add?
I actually do not think that would make it more airy.
Adding gluten would absolutely make it more dense and tough. You don’t want more gluten, but more proofing/better proofing for lighter crumb.
I tried this with all bread flour and baked it in a dutch oven (although it barely fit.) The bread is chewy and so flavorful, it’s a different animal than anything in the grocery store and so much better. Thanks for the video and written instructions.
I am obsessed! Tried this recipes (about 20 times) with different quantities of semolina flour. Today’s batch is the best!
Polish is same but after 12 hours added 50 grams too much accidentally .
100 bread flour 550 semolina flour. Oh no! Had to figure out water to maintain 75% hydration. After folding and 2 hour resting, dough was very wet. I didn’t freak out, just kept on going. Separated dough into fourths and made loaves. Very very sticky. BUT the end result was crispy crust and chewy bread. Did not add ice cubes or spray hot oven. I thought that dough was wet enough. So so good! Never thought that I could get to this point that my experience would guide me
Brava👏👏👏👏
Excellent results with this bread. I didn’t let it set for 10 hours as I didn’t have enough time, so after 8 hours I did the second step and followed the recipe correctly the rest of the way. The smell was incredible and it wasn’t finished until 8 PM and I still had to wait 30 minutes before slicing, but oh so worth the whole process. My husband and I ate about 1/4 of the loaf last night. We love poppy, sesame and flax seeds on our baked goods and this boule was covered with it and amazing. I baked it in a cast iron dutch oven and also didn’t have to cook it as long as specified and actually had to lower the temperature to 450 for 30 minutes covered and 10 minutes uncovered. Wish I could have posted the picture I took because it was beautiful. Thanks for sharing!
Novice break maker here. Am I correct in thinking that this dough does not get as much needing as some others? Just 6-8 turns every 20 minutes for an hour does not seem like a lot. I assume the shaping takes a fairly gentle hand. Thanks for great instructions.
Dough needs folding, not kneading so yes you are correct.
I’ve made this several times with all kinds of success. I have a cast iron Dutch oven and a cast iron skillet that fits perfectly on top. For this recipe, I should do two loaves. I used 3/4 of the dough last time and it was a bit crowded in the 10” pans. I do portion off a small piece and use that for a pizza crust. Thanks so much. Video is helpful. Wish I could send a pic of my beautiful bread. Not as pretty as yours, of course!
Chef could I substitute rye instead of whole wheat for this French Boulle Thk you got all ur great recipes
you could. May have to up the hydration bt 1-2%
I did exactly this with wholegrain rye and the results were great.
I made this last week and it was excellent! Could I divide the dough into two pieces shape into batards?
Yes absolutely!
At what point should I divide into two pieces? After the two hour rise?
yes
Amazing bread every time!
Now they want semolina bread! Can I just substitute Whole wheat for semolina?
I think you could.
This is an awesome recipe and always yields awesome bread!
My hubby loves crust so I divided the dough into four long loaves before the final proof. Baked at 425 for 22 minutes until internal temp reached 205 degrees.
However, crust is light in color and not too crisp. Any suggestions would be appreciated! Thank you so much for teaching me to be a better cook and baker! You rock💕
Dear Chef Parisi,
Thank you so much for this recipe! Recently, I have been very into poolish in baking. Something about each recipe I tried made me very frustrated with the finishing results. All of the bread I made became slightly saggy after cool and so hard to slice after freezing for a night, but the loaves of bread I bought from bakeries are not like that? Do bakers actually use some kind of additives in the dough? Can you share the secret with us?
No additives used.
The ferment was terrific with loads of flavor and lift. My only question is that my bread had a dark interior compared to the video. Wondering how almost 40% whole wheat was so light.
Thank you chef
Hello!
Wonderful recipe!
Made it few times – for enjoyment of family and friends !
A tip: I cut the parchment paper that lines the cast iron pot in a shape of clover : this way no dents in the shape of the bread ! Perfect boule
Thank you Chef !
Hi- Can you use a starter in place of the yeast both times it’s called for? (I’m trying not to use commercial yeast)
Yes absolutely but there will be more folds involved. Starter can be 10-15% of the recipe.
Hi Chef Billy.
I’ve had this question in my mind for a while: Can you cold ferment the dough even tough it already has a poolish?
Because I heard that and excellent bread is a bread that has had 3 stages of fermentation, and for that reason it sounds ok to me to cold ferment the dough considering that we are already using a pre-ferment.
Thanks in advance, greetings from México.
Yes after your final fold and shape you could put it in the refrigerator overnight.
Hello! What size of proofing basket do you use for a full recipe?
By the way…love, love, love your kamut bread recipe. I’ve made and given away several boules. Huge hit among my family and friends!
10″
I just took mine out of the oven after 30 minutes at 500 degrees using ice in a pan under the oven stone. No bowl covering or using a dutch oven. The directions do not say that if you do it without a covering it will be done. Mine is quite brown, hopefully not burnt. So I believe if you aren’t using a dutch oven, which I’ve done before with sourdough, or have a giant bowl to cover this giant bread then take that sucker out at 30 or even less minutes. I’m thinking when I do this again I’ll be lowering the oven temp to 475 – 450 as not to get overly dark brown. Can’t WAIT to try a slice!!
Can I bake this in a dutch oven like your other artisan breads, or is it too much dough?
You could, but I would divide it in half or by 1/3’s
I did this with a Creuset Dutch oven and fan oven set at 400F. I preheated the Creuset. After 30 minutes the bread was already at 190F. To what temp would you recommend cooking to?
190° is perfect!
After much research I’ve decided to try my first Poolish bread with your recipe. It looks great!! One question I have is what size proofing basket should I use? Thanks.
10″
After step 6 it had tripled in size but was too soft to be able to form into a tight ball, it was very runny and sticky. What went wrong?
How do you know it was too soft, did you take it out and work with it?
I had the same problem and saw it coming during the first mixing steps. I had to work in about 1C Flour. However, it is baking now and it looks to have a nice height and going in it had a really perfect bounce. I did the rise in my flour towels and this helps the bread as well in some way I think. I also live in Atlanta, GA and this is August so there’s humidity to be factored in.
Dear Chef Parisi,
Thank you so much for this recipe. I baked it today at half the recipe (it turned out quite big and a full recipe won’t go into my oven!). Everything about it was great. Love the crust, the soft inside, the even crumbs and the wonderful aroma and taste. I love it. Am a newbie at baking artisan bread (not very successful with my sourdough starter) so getting this loaf today was great. Thanks for the clear instructions! Stay healthy, Chef.
Getting ready to start this recipe. Looks easy and great. Why didn’t you show the transfer of the bread from the peel and paper to the oven in the video? Hope it will be easy. Always a problem if the bread sticks and it starts to deflate as I work it into the oven.
I am the one that shoots all of my own videos and I messed up the transition and it was way out of focus and I didn’t know it until it was already on the stone so I had to sort of fake it.
Sooo…. I think *might* have added 4g yeast to the poolish, and then another 4g yeast when I mixed the flour and water and salt to make the dough. Am I screwed?
Made a version of this by using a portion of a friend’s poolish as a starter for a new poolish, then followed your recipe. Turned out amazing, so I tried to give it a go from scratch for a second loaf following your recipe start to finish, but I *think* I might have doubled the yeast… I’ll report back.
Well, whether I over-did the yeast or not, it turned out incredible. I’ve since shared this recipe with half a dozen friends. Very simple to make, and if Chef Parisi’s instructions are followed carefully, it comes out looking (and probably tasting) just as amazing as the loaf in the video. I’m starting another poolish tonight. One loaf lasts a week, easy, and is great for sandwiches, french toast, etc. Fresh butter and homemade jam and you’ve got yourself a world-class slice.
Can you explain the differences in types of yeast? Apparently everyone has taken up bread-making so all I could get my hands on was instant yeast. Would that work?
it’ll work
I tried this recipe today and it was the most amazing bread I have made so far. So much flavor and good texture. Plus so easy to make, taking almost no effort. Let the oven and time do their job!! Thank you!!
Can I replace the wheat flour with rye or AP flour? I don’t have any wheat at home now. Thanks!
You could with both. You will need a bit more hydration with rye though.
Thanks, I baked covered @ 25 min. & uncovered 26 min.. The bread was a little burned on the bottom, but not too bad. I might try shortening the uncovered bake time. Other than that small discrepancy the bread was great! The top crust looked awesome!
If you cut the recipe in half what are the cooking times?
Maybe scale it down by 10-15 minutes. Internal temperature should still be the same though.
I think that this is a complex recipe. It is not clear what the measurements are on the poolish or how much poolish goes into the bread. Why not make the recipe into cups and ounces?
The poolish is part of the recipe. Check out the video to see when and how to use it if for some reason the text version is confusing you.
This is good bread, I am making the second loaf now and it looks great. The recipe and instruction totals don’t match though.
you’re right, it was supposed to be 100 grams add in instead of 150. Fixed it!
Sounds amazing! I can’t wait to try this!
super good!
My kids really loved it! And I loved that this is so easy to make!
So great to hear!
This bread was absolutely wonderful, not to mention beautiful. This one is a keeper for sure!
amazing!
This is really gorgeous! Something I’d love to make again and again!
Thank you so much!
Ahh this bread is seriously amazing! And you walk us through it so well that even a total bread novice can make it! Thanks for sharing!
awesome, thank you!
This bread is gorgeous and tastes amazing!
Thank you!