Brick Chicken
Published January 24, 2025. This post may contain affiliate links. Please read my disclosure policy.


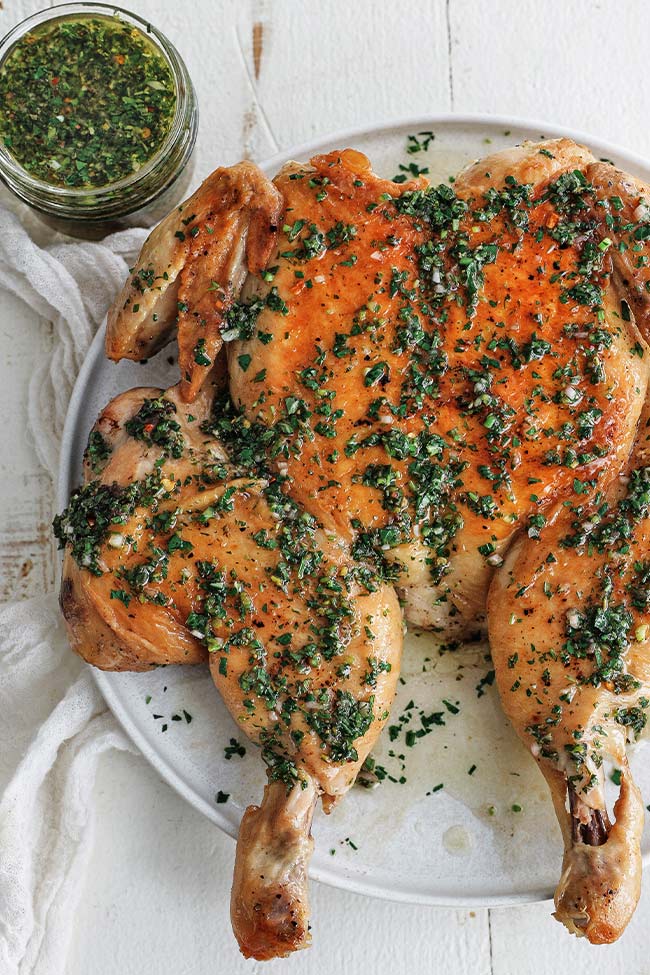
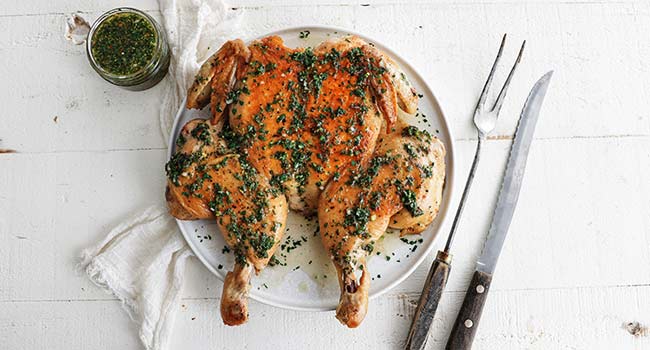
This Brick Chicken Recipe is incredibly crispy and juicy thanks to a technique that involves flattening, searing, and roasting a whole chicken under the weight of foil-wrapped bricks. I love putting this meal together to add some theatrics to our weekly family dinners.
By spatchcocking a whole chicken and weighing it down with bricks, the bird cooks evenly and turns out incredibly juicy with golden brown, ultra-crispy skin. Even better, it takes less time than a traditional roast spatchcock chicken.
What is Brick Chicken?
Brick chicken, known in Italy as pollo al mattone, is a creative cooking method with Tuscan roots. It involves pressing a whole spatchcocked chicken under the weight of bricks or another heavy object while it cooks.
The method was initially used on open fires (which is still an option if you’re ready to fire up the grill), but nowadays, recipes for brick chicken are conveniently made using the stovetop-to-oven technique.
I love this fun and easy cooking method for weeknight dinners, it’s just as delicious and simple as beer can chicken. This chicken under a brick method gives me the crispiest, golden skin with juicy, flavorful meat every time. Whether I’m making it for a family dinner or to wow my guests, it always turns out delicious.
Ingredients and Substitutions
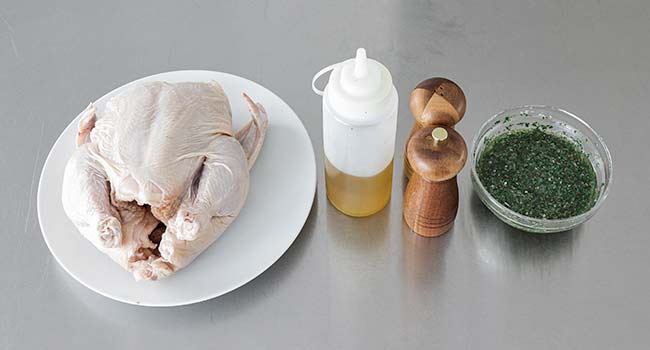
- Chicken – A fresh or frozen and thawed 3 ½ to 4-pound whole chicken is best for this recipe. Even spatchcocked cornish hens or bone-in, skin-on chicken thighs can be cooked using brick.
- Oil – Stick with a high-heat oil, like light or regular olive oil, to prevent the chicken from sticking. Avocado oil, clarified butter, or another neutral-tasting oil with a high smoke point also works.
- Seasonings – I seasoned the chicken with salt and pepper. You can use my homemade poultry seasoning as an alternative or my dry BBQ rub for more flavor.
- Sauce – A good sauce takes this chicken to the next level! I love using my chimichurri sauce for a fresh, herby kick, but pesto vinaigrette or even cilantro lime sauce are just as delicious.
How to Cook Chicken Under a Brick
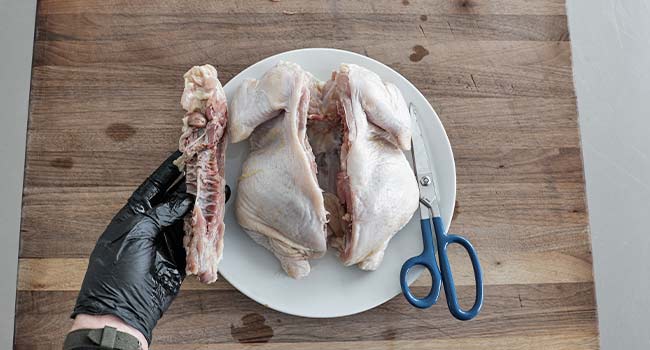
Prep the Chicken: I place the chicken breast-side down on my cutting board. Then, I cut out the backbone.
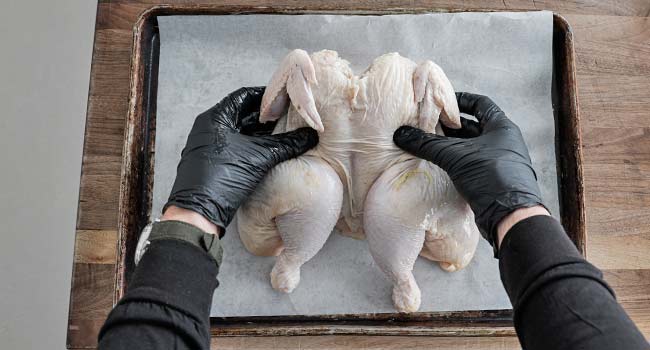
Flatten it Out: I flip the chicken over and press down firmly in the center until I hear a slight crack. This helps flatten the breastbone, ensuring even cooking and extra crispy skin.
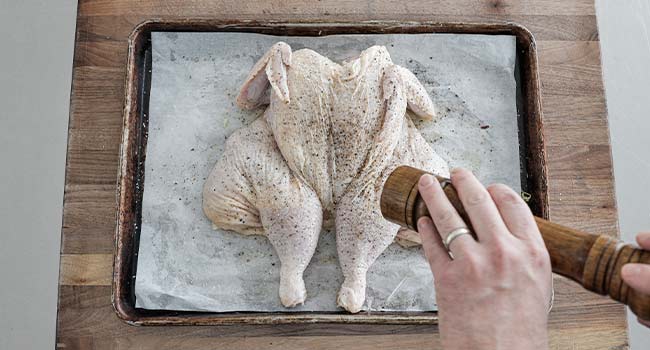
Season it Up: I pat the chicken dry on all sides with paper towels. Then, I drizzle it with olive oil, season generously with salt and pepper, and set it aside.
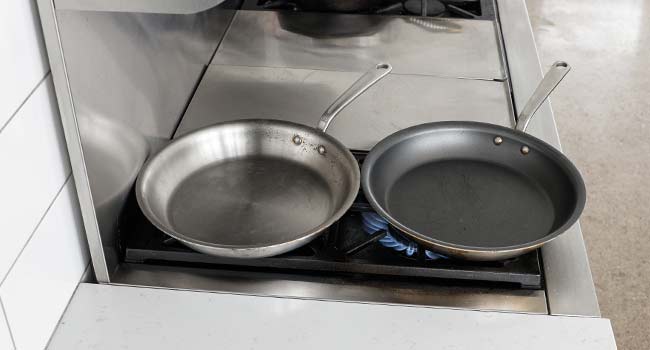
Heat the Pans: I preheat two equal-sized oven-safe pans on separate burners over high heat, getting them nice and hot for a perfect sear.
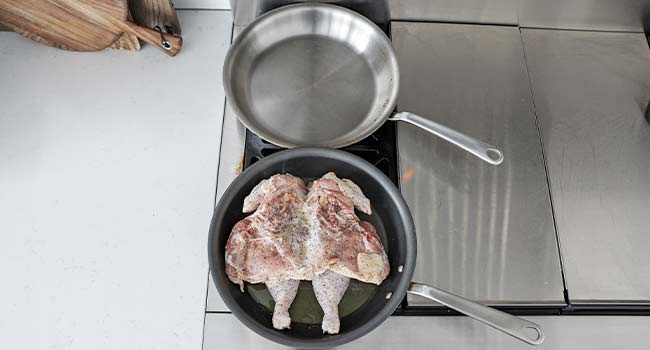
Sear the Chicken: I add a splash of olive oil to one pan, then carefully place the chicken skin-side down.
Press it Down: I drizzle a little oil on the bottom of the second hot pan, then place it directly on top of the chicken.

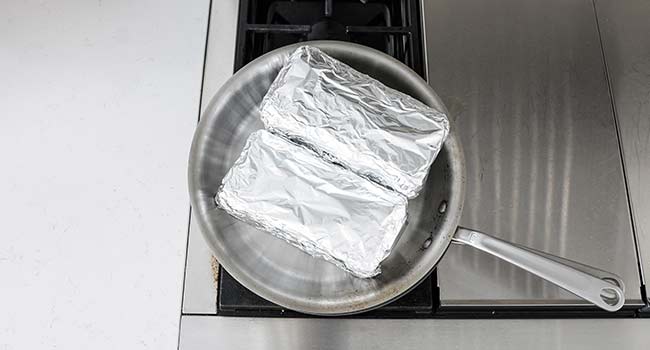
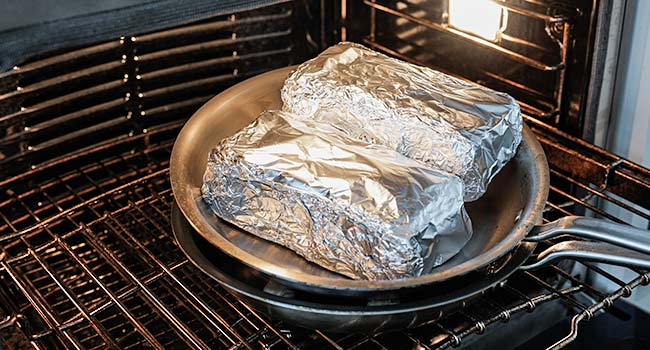
Weigh it Down: I place two foil-wrapped bricks on top of the second pan to add weight and ensure even contact. Then, I let the chicken sear for 5 minutes.
Roast to Perfection: I transfer the chicken, pans, and bricks into the oven and let it roast for 20 minutes.
Flip & Finish: I take the chicken out of the oven, remove the bricks and top pan, and carefully flip it over. Then, I place it back in the oven uncovered for 10 to 15 additional minutes to finish roasting before setting it aside to rest.

Chef Tip + Notes
My #1 tip for making this brick chicken extra juicy and crispy is to dry brine it with coarse salt in the fridge for 6 to 12 hours before cooking. This process locks in deep flavor, enhances tenderness, and creates that irresistible, golden-crisp skin that makes every bite unforgettable.
- Preheat for the Perfect Sear: I always heat my skillets for about 5 minutes to create the high-heat environment needed for that golden, even sear.
- No Bricks? No Problem! I use a heavy skillet, grill press, or even a baking dish filled with pie weights, as long as it’s oven-safe and wrapped in foil, it works!
- Check the Temp: I know the chicken is fully cooked when the thickest part reaches 160°F to 163°F, no guessing needed!
- Rest for Juiciness: As it rests, the chicken naturally reaches 165°F, locking in all those juices for extra tender, flavorful bites.
- Grill it Instead: Feel free to grill the chicken under bricks instead. Preheat your grill to medium heat and place the flattened and seasoned chicken directly on the hot grill grates, skin side down. Place your foil-wrapped bricks on top and grill for 15 to 20 minutes. Flip and continue grilling until cooked through.
- Boost the Flavor: sometimes I marinate my chicken in chicken marinade, or in my easy homemade Italian dressing for 4 to 12 hours to add extra depth before cooking. Pat the chicken dry with paper towels before searing.
Serving Suggestions
I love pairing this crispy brick chicken with a zesty peri peri sauce or the bold, herby flavors of aji verde for an extra kick.
For sides, I usually go for roasted root vegetables to soak up all those juices and a crisp fresh kale salad.
Make-Ahead and Storage
Make Ahead: You can spatchcock, season, and store your chicken in the fridge for up to 24 hours before cooking. The roasted chicken can be wrapped in foil and kept in a turned-off oven for up to 90 minutes before serving. If you’re serving the chicken with chimichurri sauce, make it a day in advance to let the flavors meld (it stores well in an airtight container in the fridge for up to 1 week).
How to Store: Let the cooked brick chicken cool completely before transferring it to an airtight container. Store in the fridge for 3 to 4 days or in the freezer for up to 3 months. Thaw the chicken in the refrigerator overnight before reheating.
How to Reheat: Reheat the chicken on a baking sheet in a 375°F oven for 10 to 15 minutes. Or, for smaller portions, reheat them in a skillet over medium heat with a touch of olive oil.
More Whole Chicken Recipes
- Peri Peri Chicken
- Chicken Marengo
- Roman Chicken Cacciatore
- Grilled Spatchcock Chicken
- Peruvian Chicken (Pollo a la Brasa)

Brick Chicken Recipe

Ingredients
- 1 whole roasting chicken, about 3 ½ to 4 pounds
- 6 tablespoons olive oil
- coarse salt and freshly cracked pepper to taste
- chimichurri sauce
Instructions
- Preheat the oven to 450°.
- Place the chicken breast side down and, using kitchen shears, cut on either side of the backbone to remove it.
- Next, flip the chicken over and press inwards to pop the breast bone to flatten it.
- Pat it down on all sides with a paper towel.
- Lightly drizzle both sides with olive oil, and then generously season both sides with salt and pepper. Set aside.
- Now, place two equal-sized medium to large sized sauté pans over separate burners on high heat and let stand for 3 to 4 minutes.
- Add 3 tablespoons of olive oil to one pan and place the chicken into it skin side down. Turn over the other pan and drizzle the remaining olive oil over the bottom of the pan, then add it to the top of the chicken.
- Next, place two bricks on top of the pan that have been wrapped in foil and sear the chicken over high heat, untouched for 5 minutes.
- Transfer the chicken to the oven and cook it for 20 minutes. Then, remove the bricks, flip the chicken over and return it to the oven uncovered for 10 to 15 additional minutes or until it is well browned and the thickest part of the breasts is about 160°-163°.
- Remove the chicken and let it rest for 5 to 7 minutes.
- Serve with optional chimichurri sauce.
Notes
- Preheat for the Perfect Sear: I always heat my skillets for about 5 minutes to create the high-heat environment needed for that golden, even sear.
- No Bricks? No Problem! I use a heavy skillet, grill press, or even a baking dish filled with pie weights, as long as it’s oven-safe and wrapped in foil, it works!
- Check the Temp: I know the chicken is fully cooked when the thickest part reaches 160°F to 163°F, no guessing needed!
- Rest for Juiciness: As it rests, the chicken naturally reaches 165°F, locking in all those juices for extra tender, flavorful bites.
- Grill it Instead: Feel free to grill the chicken under bricks instead. Preheat your grill to medium heat and place the flattened and seasoned chicken directly on the hot grill grates, skin side down. Place your foil-wrapped bricks on top and grill for 15 to 20 minutes. Flip and continue grilling until cooked through.
- Boost the Flavor: sometimes I marinate my chicken in chicken marinade, or in my easy homemade Italian dressing for 4 to 12 hours to add extra depth before cooking. Pat the chicken dry with paper towels before searing
Delicious and so very easy. This is a go-to all the time.
Fantastic!